The Influence Of Colour & Light;
A Photographic Study
Introduction/ Initial Response
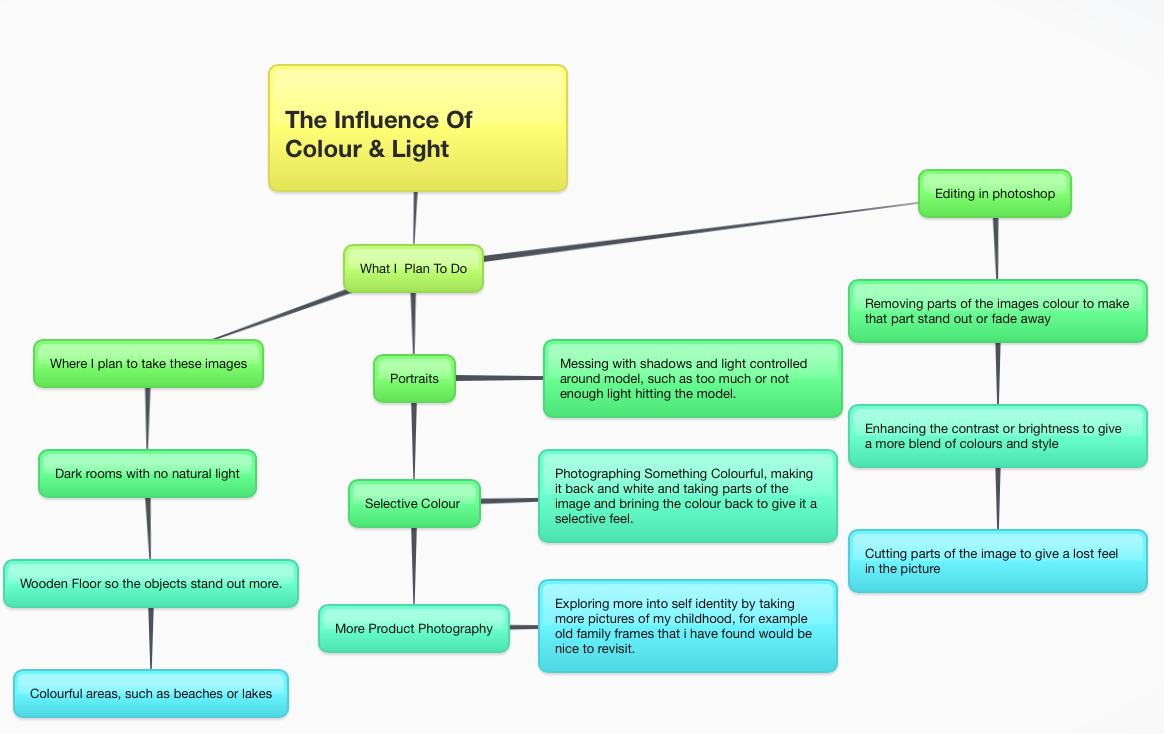
I have decided that I am going to investigate the topic of Colour and Light for my A-Level project.
Colour and Light are present in every single photograph ever taken. They are vital aspects and both can be manipulated to create a range of different photographic effects. This is something I’m really interested in and I think it will help my photography grow. Colour to me in photography is simply colour photographs and black and white photography. However a quick internet search shows that there is much more to it than that. Fashion photographers use a range of different colours gels on lights to give a distinct coloured look to their photography. The aperture, iso and shutter speed can all be adjusted to effect the colours in a photograph. The lighting used can be used to effect colours and this is just the tip of the iceberg. Lighting can be broken down into 2 categories, studio and natural lights. As I mentioned above they can be used to effect colour but they are also used to create a particular effect on a photograph. The 2 most common styles are high key and low key lighting. Lighting can also be harsh and soft depending on the type of shoot. Lighting can also be used to create shadow which also links back to colour. Black and white photography is as popular as ever.
Personally without colour i wouldn't be interested in photography, colour is the characteristic of human visual perception described through color categories, people will use colour to identify parts of the image or the style the image is taking. Secondly why i decided to include light and shadows to my topic study, Being able to fully use light is a very difficult task, you have to experiment with all different light sources, such as natural light and forced light, and will have to mess around with the composition of the shot if you want to take full advantage of light. I wanted to write about my experience with light because it has played a huge role within my images in the past and can make an image look more dramatic or calm depending on the shadow foreplay used. I really like taking an image and messing around with the lighting, it reminds me of shading with black chalk in Art & Design to create a blended shadow colour. There are many examples of photography techniques were light and shadows play a huge part, for example, portraits, silhouette’s, light trails, Natural Shadows, Personally i wanted to write about different styles of techniques rather than one main topic, under my overall topic of colour and light. Using all of these techniques inspires me to try new things and use my research to learn more in depth about a certain technique. The technique allows me to stay interested as i feel like i am able to always try something new and being able to recreate a technique keeps me engaged constantly by learning about the basic rules of how light or colour has an effect on an image.


Research
The Work Of Other Photographers
Light And Shadows Within Portraits


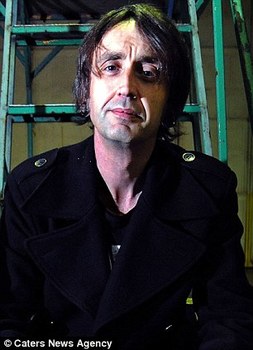
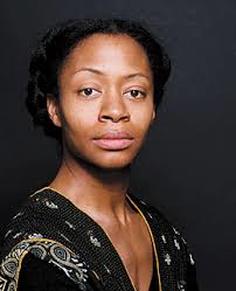
A portrait is a painting, photograph, sculpture, or other artistic representation of a person, in which the face and its expression is predominant. The intent is to display the likeness, personality, and even the mood of the person. Andy Gott a chose artist research has primarily focused his career on high key black and white portraits of people showing some form of emotion, but he has taken some images that aren't black and white and has left the natural skin colour in the image, and is known for taking phenomenal photos.


Artist Research
|

|
I wanted to start by talking about Simple portraits and link to an artist who focuses on light and shadow for taking portraits, A portrait is a painting, photograph, sculpture, or other artistic representation of a person, in which the face and its expression is predominant. The intent is to display the likeness, personality, and even the mood of the person. For this topic i particularly decided to focus on Andy Gotts, who is a photographer from London, is mostly noted for his black and white portraits of Hollywood actors but also his incredible talent in placing actors for the use of the light. Since 1990 Gotts work has been published internationally and has appeared in many magazines, including; GQ, Empire, FHM and Total Film. I decided to use his work because he talks about every step that is taken to create such a detailed picture with light and shadows, for example, his most viewed photo is a self portrait he took in 2008, the image was taken to show his audience the use of shadows and composition of a model, he showed the blended tone of black and greys he used in his background to make him look more bright. This image inspired me to do some for my own and experiment with making them black and white and also changing the tone and levels of the brightness. Andy also talked about the use of the rule of thirds, having the first third of the picture have the most seeable colours as the light parts of the colour are on this side as it goes from left to right as dark to bright, while the other two thirds of the picture drag your attention as the model himself is more leaned towards the right side within the dark created shadow. On a more technical side, the lights he used were Butterfly Lights, which is one of the oldest techniques for lighting a subject. Named for the butterfly-shaped shadow that forms underneath the subject's nose, this setup is a proven method to ensure your subject is well-lit in a pleasing manner. He used this lighting technique because it proved the most effective with the contrast blend of shadows. Andy Gott has primarily focused his career on high key black and white portraits of people showing some form of emotion, but he has taken some images that aren't black and white and has left the natural skin colour in the image.
Example Talked About

My Own Photographic Work


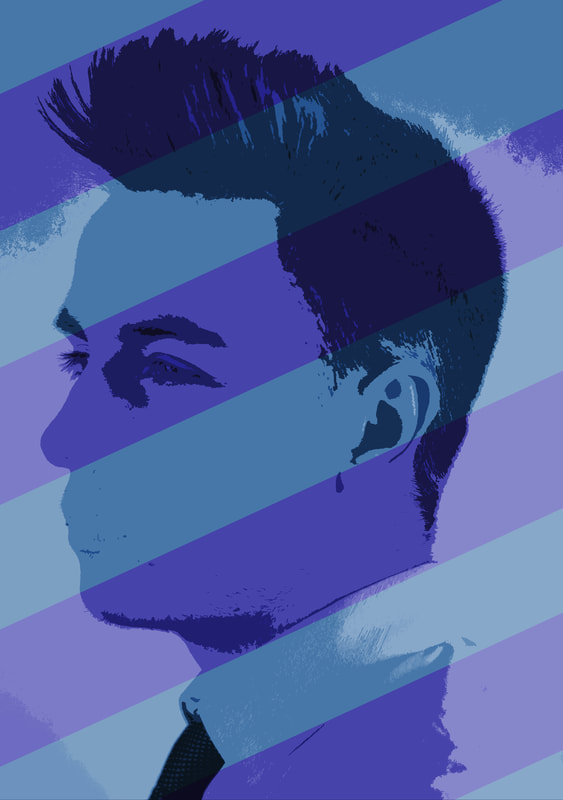
How I used Light & Shadows to strengthen my work, Light & Shadows are a very unique powerful use of tool of photography to create meaning, I gained a great detail of experience when taking these images and used Andy Gotts Technique to help improve my work. Firstly, I started by taking moody portraits of my friend in a dark room and used a DSLR camera on manual setting to take the images, I also had a powerful LED light as a lighting source to bring the models facial features up, I took a gallery of these images having the model looking different ways and portraying different emotions, such as anger or sad. I then used Andy Gotts technique of turning the image black and white and raising the contrast to create a black, grey and white style from right to left, this makes the image more powerful and unique, also more personal as the emotion from the models face is telling a story how ever you take it, you could think about why the model is portraying the emotion they are. I then lowered the brightness of the image to give the background wall a bit more in depth detail, this worked well and gave the image more a darker blend.
Selective Colour Portraits


I then moved onto Colour images, I used white board projections from google and searched up some of my hobbies, such as design and filming, and used these to inmate rankins work. While in photoshop i decided that i would try experiment with the images by pushing the hue saturation all the way on most images, i always hired the brightness and contrast to give the image a more darker look. Looking back on the images i think they look very creative and show a clear link to rankin’s work.
A Photoshop Development


I decided that i would focus on low key lighting for my Black and White images as they look more dramatic and serious and show the emotional side of my model. I started by taking portraits in a dark room using an infrared light flash to create a dark background with a light foreground, i focused on the model's face and position to try and imitate what rankin done with his images as they give me the most inspiration from his photoshoots. I then took my images into photoshop and edited them while researching rankin to use some of his techniques to strengthen my images.
Painting People And Face With Light


Michael Bosanko,
|
|
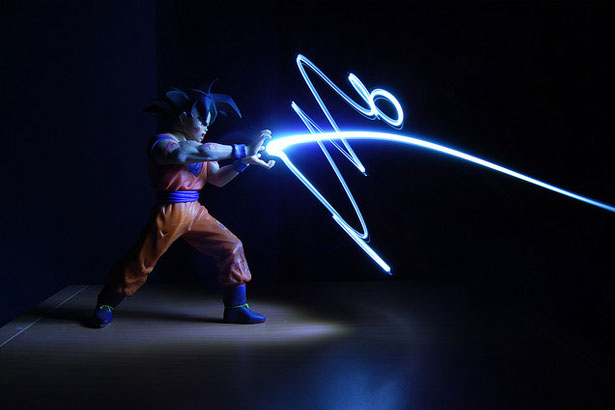
Secondly, the use of light trails, this technique within photography is very unique and pushes the limits of a camera to create exposures by moving a hand-held light source while taking a long exposure photograph, either to illuminate a subject or to shine a point of light directly at the camera, or by moving the camera itself during exposure. This technique links in with my overall topic Light & Shadows because to create this style of image you must be in complete darkness when taking the image and able to control the light in order to get this technique to actually work. My chosen artist research for this topic is, “Michael Bosanko” who specialises in light trails and making his images stand out at a first glance, for example one of his best viewed images is this dark low key photo showing a toy action figure merging with the painted light trails by Michael Bosanko, this image is very unique and exciting to look at, there is a great level of detail in the blended grey shadows in the background of the image. There is a contrast of colours as the blue tint is blending in with the action figure, to take a successful light trail image you must have your camera to a low shutter speed so when the camera is taking the picture any light that moves will be captures and create. This image can actually be a great training ground for those wanting to get their cameras out of manual mode and to experiment with shooting in low light at longer exposures.
Example Talked About
I have taken reserach images of painting with light and silhouette’s, i will use these images to improve upon my own work by taking their techniques and adding them to my photoshop skills. I really enjoyed the expression that the light painting images give off as they look very dark and moody but make you interested in that person's story and why they are hiding from the camera.The silhouette images are very bright and colourful and show a unique contrast with the artist model and the bright sun/ light behind them. These images look very meaningful and make me want to replicate these images myself. The images i have chosen all represent the theme of life and nature and show normal people with a bright background forcing them as a shadow. In my work i will use all of these techniques to add a mood and tone to the image.
My Own Photographic Work


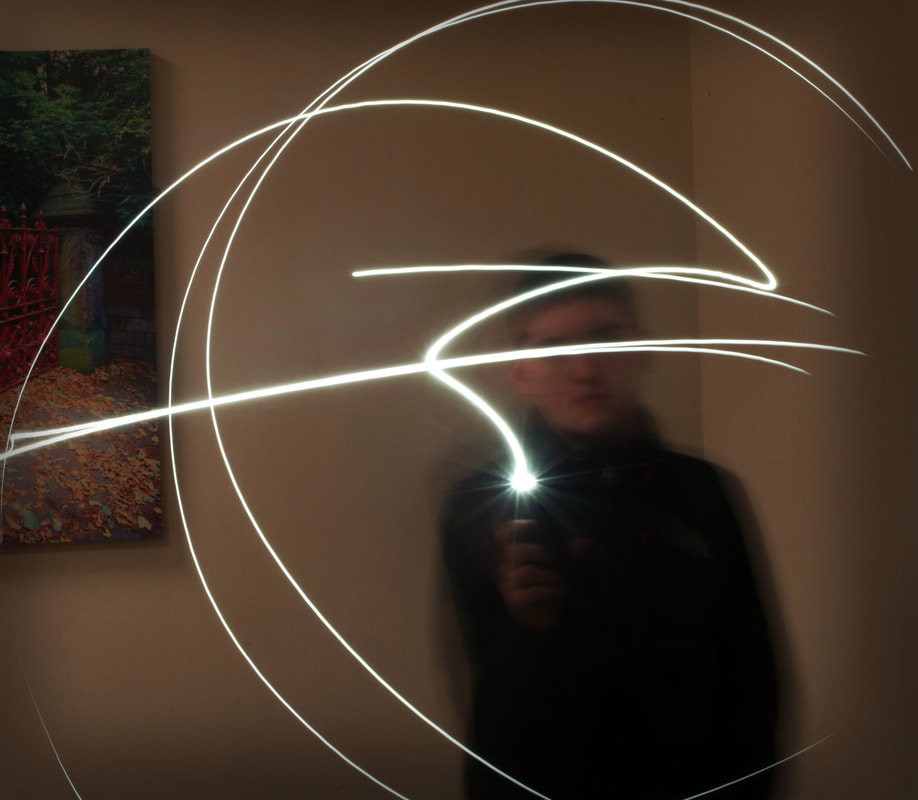


How I applied Michael Bosanko’s technique to strengthen my work of light trails, Firstly before researching Michael Bosanko I had never seen or experienced light trails, but after researching more in depth about the topic I think light trails are a very powerful technique that can be used in photography and understand that they are very difficult to create and replicate what Michael Bosanko has done. I decided to go and try to take my own images. Firstly, I had to research specifically what setting the camera has to be on to create this image style, I found that the camera's shutter speed had to be lowered also the light settings had to be lowered or the image would just be plain white with no substance. After figuring out the settings I then went to take some images, i had my model stand in another empty room with no natural light and photographed in different positions. For a first time trying this camera setting i tried experimenting more with the color rather than the location. I think these images turned out really detailed and well and would like to look more into light trails in the future using a more mobile set up, more than likely going into busy streets and having the model stand completely still while the people move past the camera lens as the they are the trails.
Disguising People & Face Using A Silhouette


Kara Walker
|
|
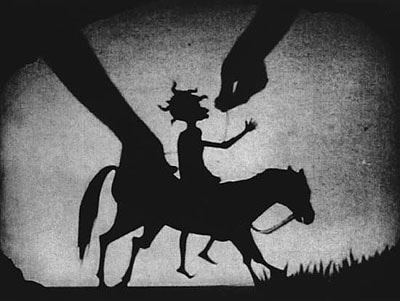
Another area i wanted to explore is silhouettes and like to an artist who focuses on this area, A silhouette is a wonderful way to convey drama, mystery, emotion and mood in a picture. A silhouette is defined as a view of an object or a scene consisting of the outline and a featureless interior, with the silhouetted object usually being black. For this topic i decided to put all the focus into Kara Walker, who is an African-American contemporary painter, silhouettist, print-maker, installation artist, and film-maker who explores race, gender, sexuality, violence, and identity in her work. I decided to use her work as she explains every step of detail in her work and the level of detail and patience that is needed to create an image like this. One of her best images is a black and grey image that shows a man riding on a horse with giant hands in the sky controlling him and the horse, this image is very detailed and tells a story about how we are being controlled no matter how fast we can run. She used a blended tone of black and greys in her background to make him look more bright and contrast to the background which is lighter base than the model substance which is black. She also has used people showing some form of emotion, but has taken some images that aren't black and white and has left the natural skin colour in the image. I really like her style of work and this topic particularly as it shows a great level of skill to work against light which isn't easy when operating a camera as light controls how much the picture is bright or dark.
Example Talked About
My Own Photographic Work


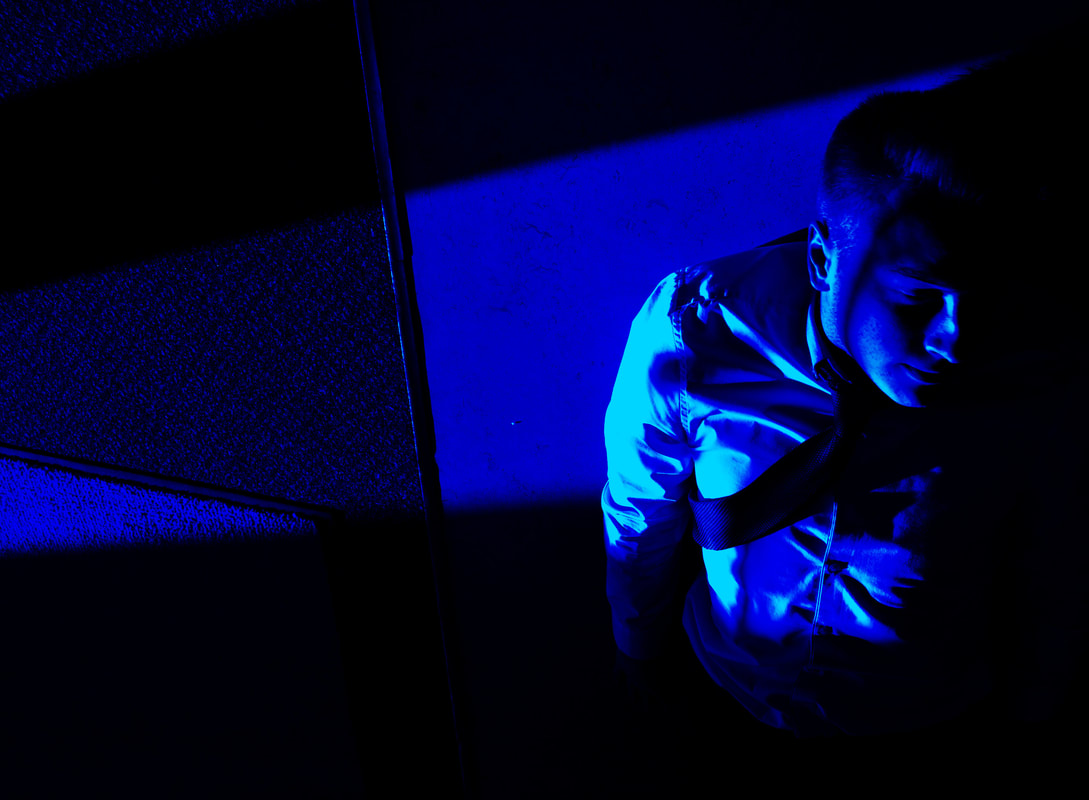
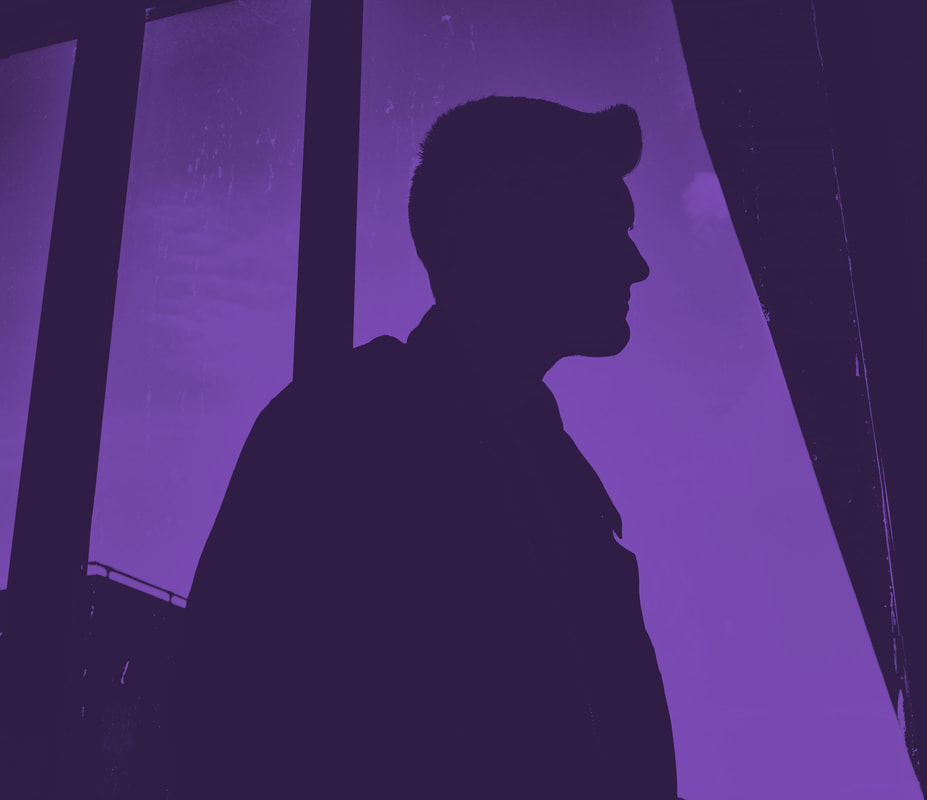

Using silhouettes to strengthen my work, firstly after researching this topic I decided I wanted to explore taking pictures and messing with selective colouring with in the photo, weather that be by adding or removing all or parts of the image i think this works really well and can send a powerful message. My first attempt at this was not as successful there was no natural bright source of light so i had to use a bright LED light and mess with composition in the shot, revisiting this topic i chose a sunny day take my images, the first image on the right was a friend on the floor with a pathed light way leading into him, i really liked this picture before editing it and think it was very powerful but wanted to explore selective colouring so i added a dark blue tint over the image and darken parts to make the eye focus on the light source as well as the model, i also messed with the saturation of his skin colour to blend in more with this blue tint, the image is very powerful and well constructed of how it is placed and how i used the light to create meaning. I also decided to use this topic in bright sources behind the model and making hand gestures with a blurred out model being darkened. If i was to revisit this topic i would explore having multiple people in the image and having a clear story be told rather than a mystery.
Rankin Destroy Project
Initial Thoughts/ Ideas
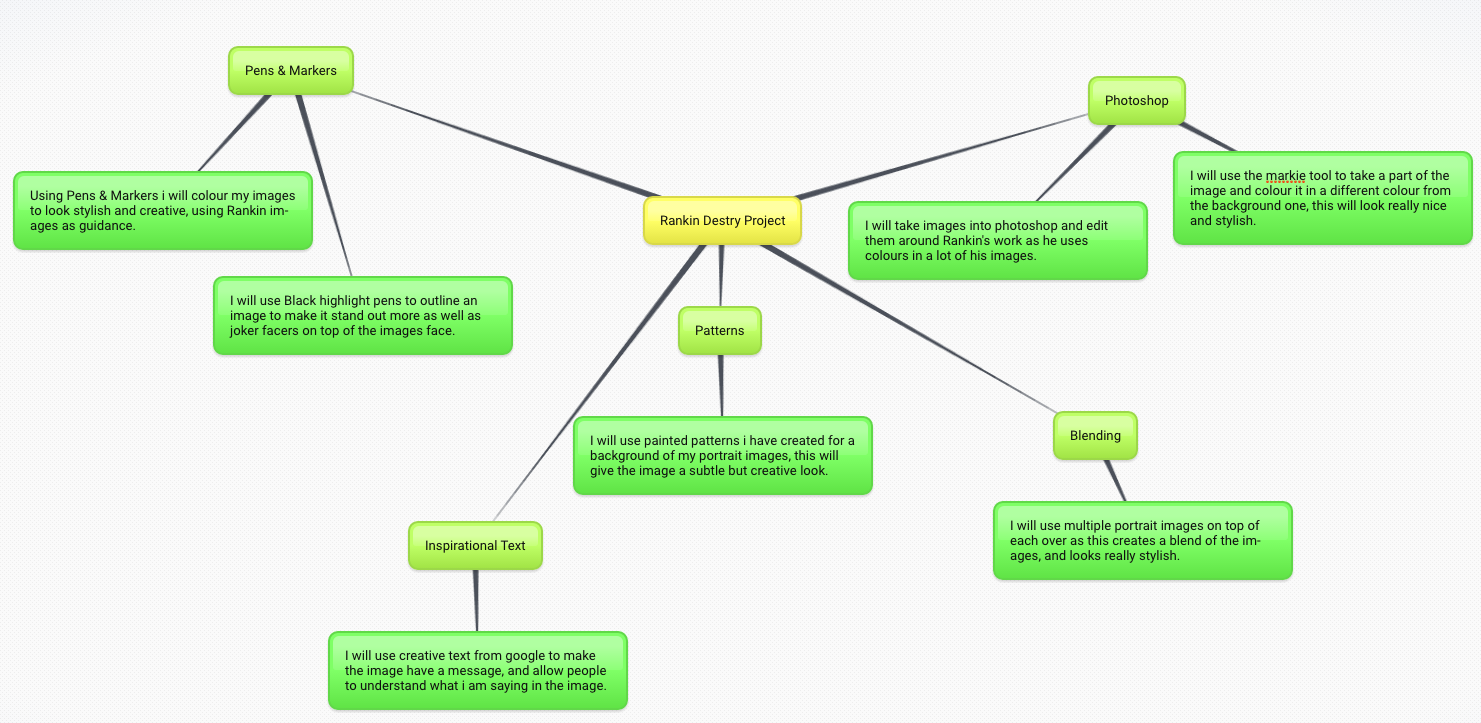
Initial response for Rankin destroy project, is taking portrait images and destroying them using paint, markers, photoshop techniques such a colour saturation or enhancing the image/ blending colourful images over the image. Also would like to take images of landmarks here in Liverpool that i can destroy using similar methods. I also would like to try and experiment with some ideas Rankin has done himself, such as paintbrush or artist masks. These are my initial ideas on where to take this project. I think using these ideas i can create some really stylish images that can tell a story or change a mood. I will start by taking the pictures using models and editing them with basic photoshop skills, I might get more ideas when i start taking the photos for how i wish to take the images.
Research On Rankin's Work


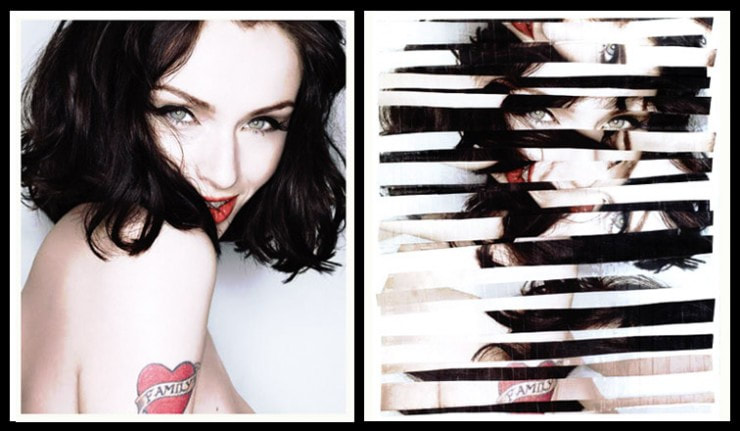


Doing my research on “Rankin”I found out that he is a British portrait and fashion photographer, who loves taking low key lighting portraits of people in cool costumes or bright makeup. His work is very talented and professional as he makes sure all his work is taken correctly and works hard to produce high quality photos. I enjoyed looking into his work as i am going to link all my work to him, his ideas are very creative and original which is why i will be using his idea to strengthen my images. Rankin loves playing with the emotions of an image, as there is always a backstory to every picture and can always be talked about in a positive way. Doing my research, my favourite images of his work is the ones below as they looks very powerful and also has colourful aspect to them, i love the waviness of the colours around her hands, as well as the seriousness of her facial expression.
My Photographic Work
Raw Images


My Photographic Work
Edited Images
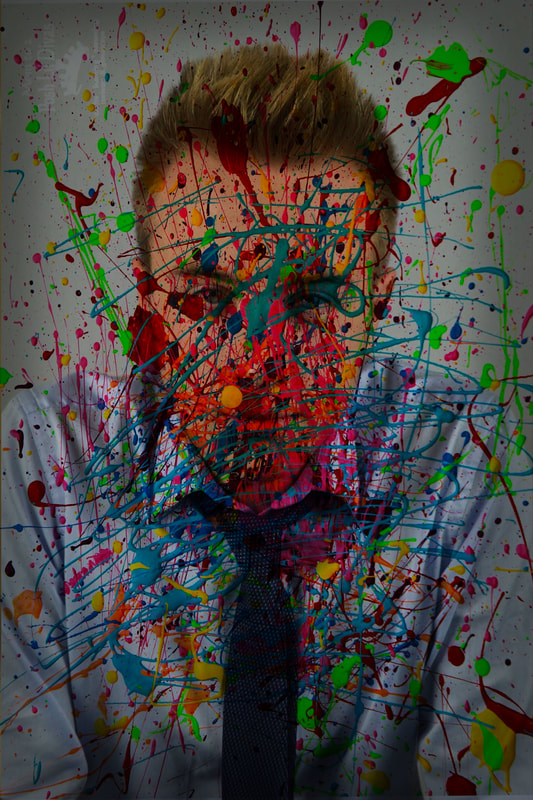

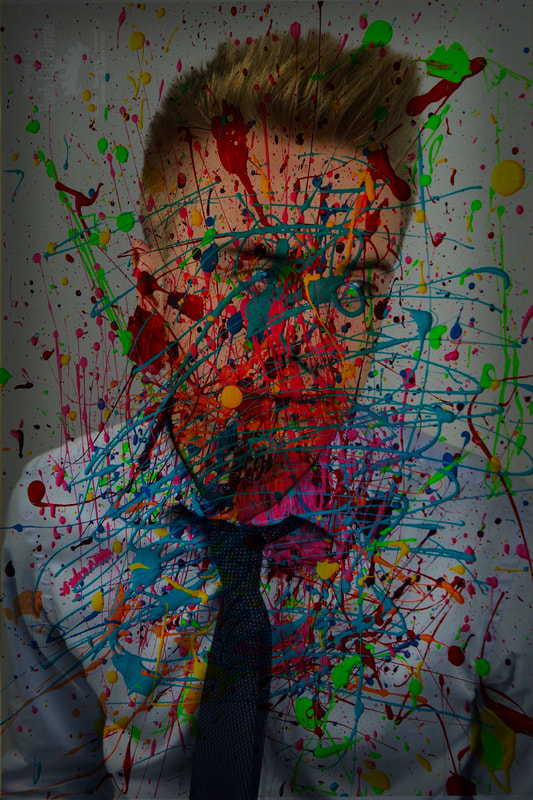
For these images above I used Rankin style work to paint over my images of my model in different positions to show change and use of colour which links in to my overall theme being colour and light and what the influence of that gives me.

|

|

|


Photoshop Development


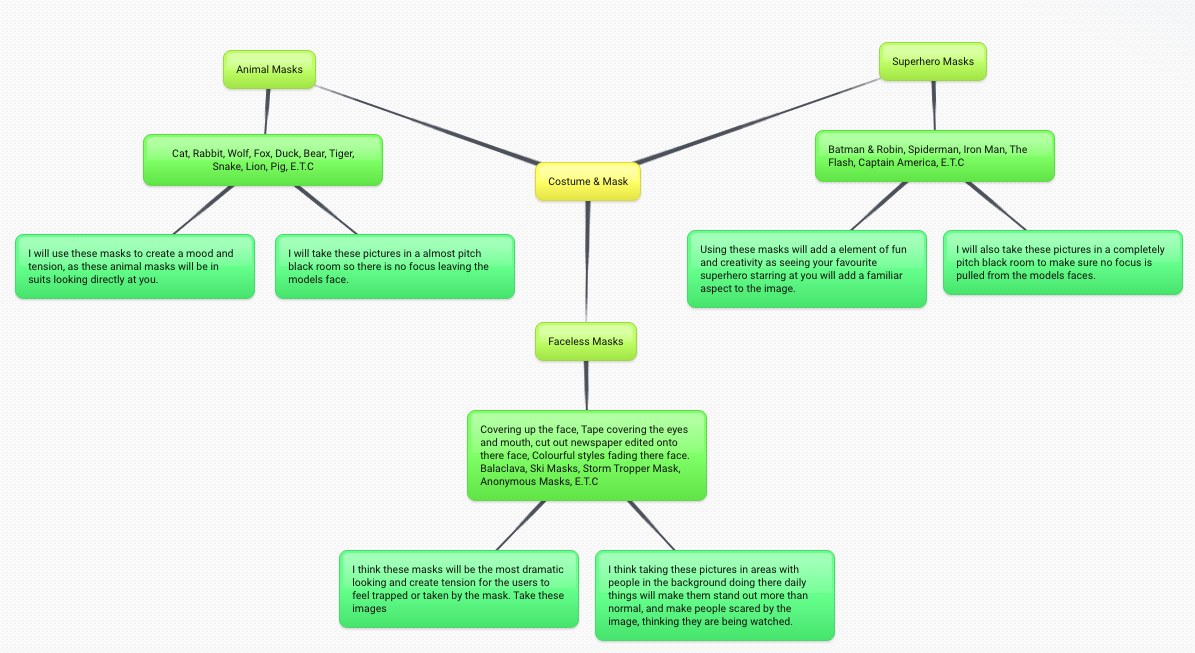
Costume & Mask
Initial Thoughts/ Ideas
Initial ideas on Costume & Mask are, superhero masks, animal masks, dark faceless masks, colourful costumes, these are my initial ideas on where to take this project. I think using these ideas i can create some really stylish images that can tell a story or change a mood. I will start by taking the pictures using models and editing them with basic photoshop skills, I might get more ideas when I start taking the photos for how i wish to take the images. I will take most of my images in a dark room with no background so all the focus is on the model, I am very excited to explore this project as I feel it involves a great detail of creativity.
Initial Research Gallery
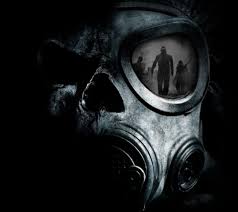


After researching Costume and Mask photography, I have gained a lot of inspiration for this chosen topic and think that using masks to create tension will work well for the images. I am excited to look at all the different masks that i can use on a model, I will take all my images in a very bright room by UV lights being the only source of light so it is nice and bright, i will take the images with a white or black backdrop depending on the colour of the mask with a DSLR camera, then export them into Photoshop where I will edit the pictures in basic formats to keep them as close to the original as possible, with a few experimental galleries towards the bottom of the topic.
Researching the Work of Others:
John Stezaker


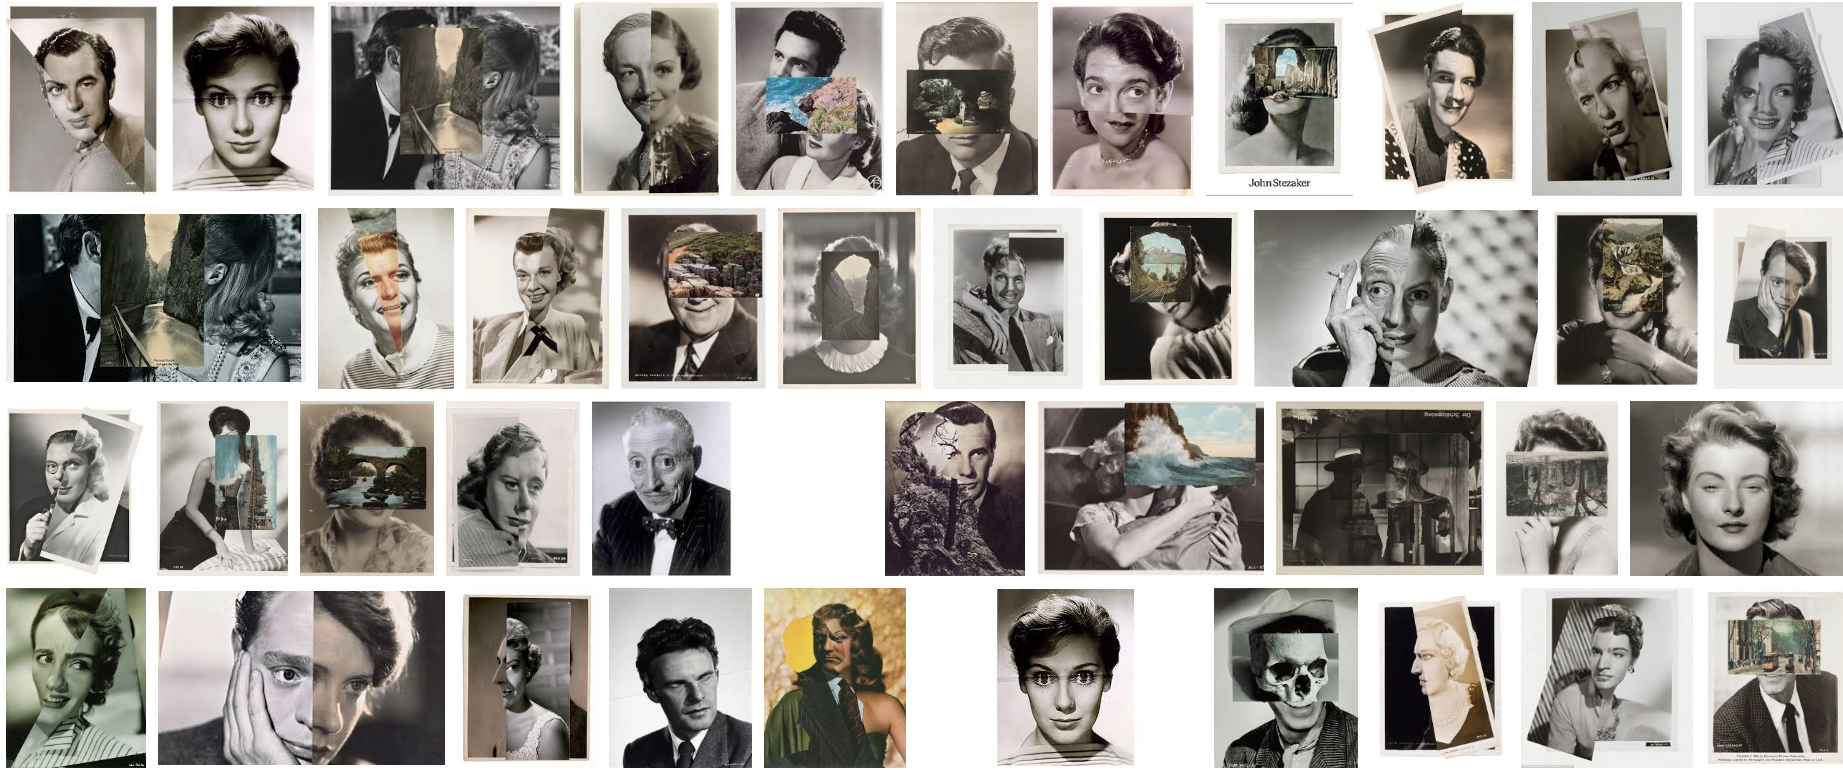
John Stezaker's Style
John Stezaker is an english conceptual artist who loves constructing an image to hide a person's face to show meaning. His style is vintage and old as he likes to explore older times photos and try to replicate what pictures would have looked like before colour photography was a thing. He uses costumes of old style 80s to create meaning as older people will recognise that costume area and want to see more. His images are very interesting and at a first glance doesn't look very professional or interesting, but when you look again and reconsider what he has done to the image you look at it from a different light and have more of an interest to his work.
Deconstruction Of
John Stezaker's Work

My Work
Using His Technique

|

|
I really admire John Stezaker’s work, looking more into his technique to disguise and construct an image is very challenging and involves a lot of precision and detail, from taking the picture to match what you want to create and putting the overlay of his image is very difficult to replicate, i decided to challenge myself and attempt to replicate one of his many images, i choose a black and grey portrait with a faded circle placed very specifically over the face to create disguise for the model and have a landscape image with a tint blue placed within the circle, at first i really didn't think the image would be to difficult to create but after looking at the image in greater detail and struggling to even get my starting mage i realized how much detail had went into the image. I started by taking a similar size and composition portrait of my friend showing zero mood as the model in the image does, then placing the image in photoshop CS5 and editing the image, i started by turning the image black and white and lowering the blank using curves tool, then i had to disguise my model and place a perfect feathered circle other the correct area of the models face, this created a very difficult challenge and took a lot of time to get the right shape, i then placed a water side image of the venice rivers and faded the image into the models face, I then changed the opacity of the image and put a very light blue mint green over the venice image.
Researching the Work of Others:
Saul Steinberg & Inge Morath


Saul Steinberg & Inge Morath Style
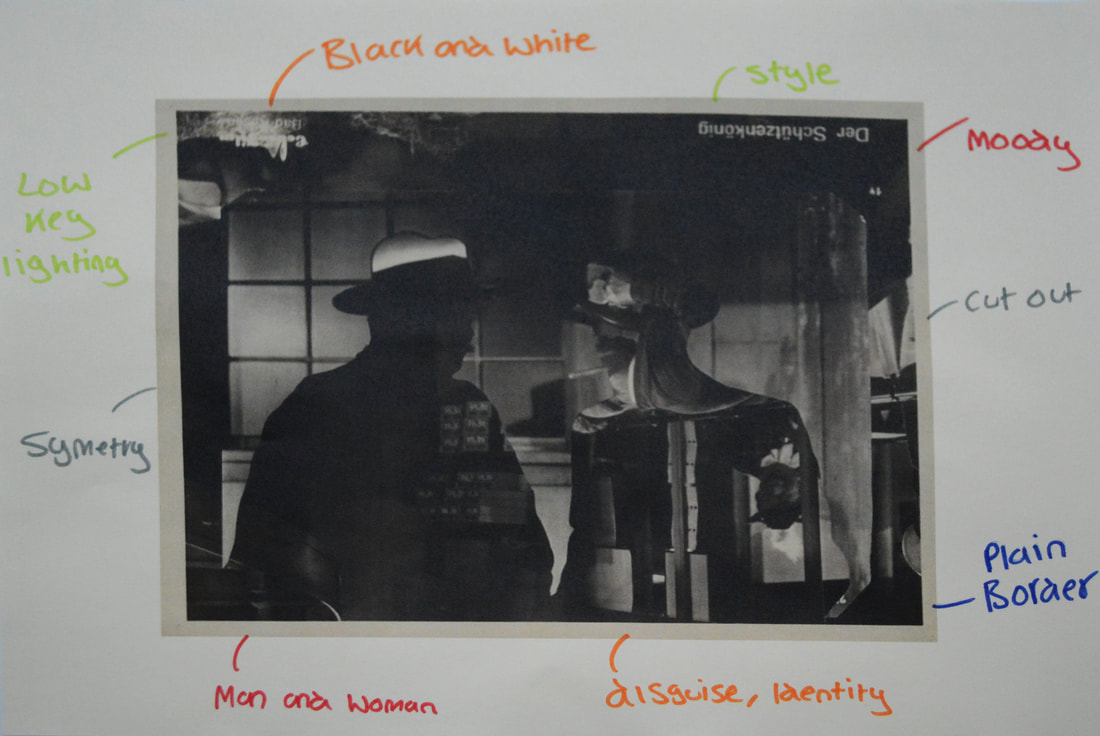
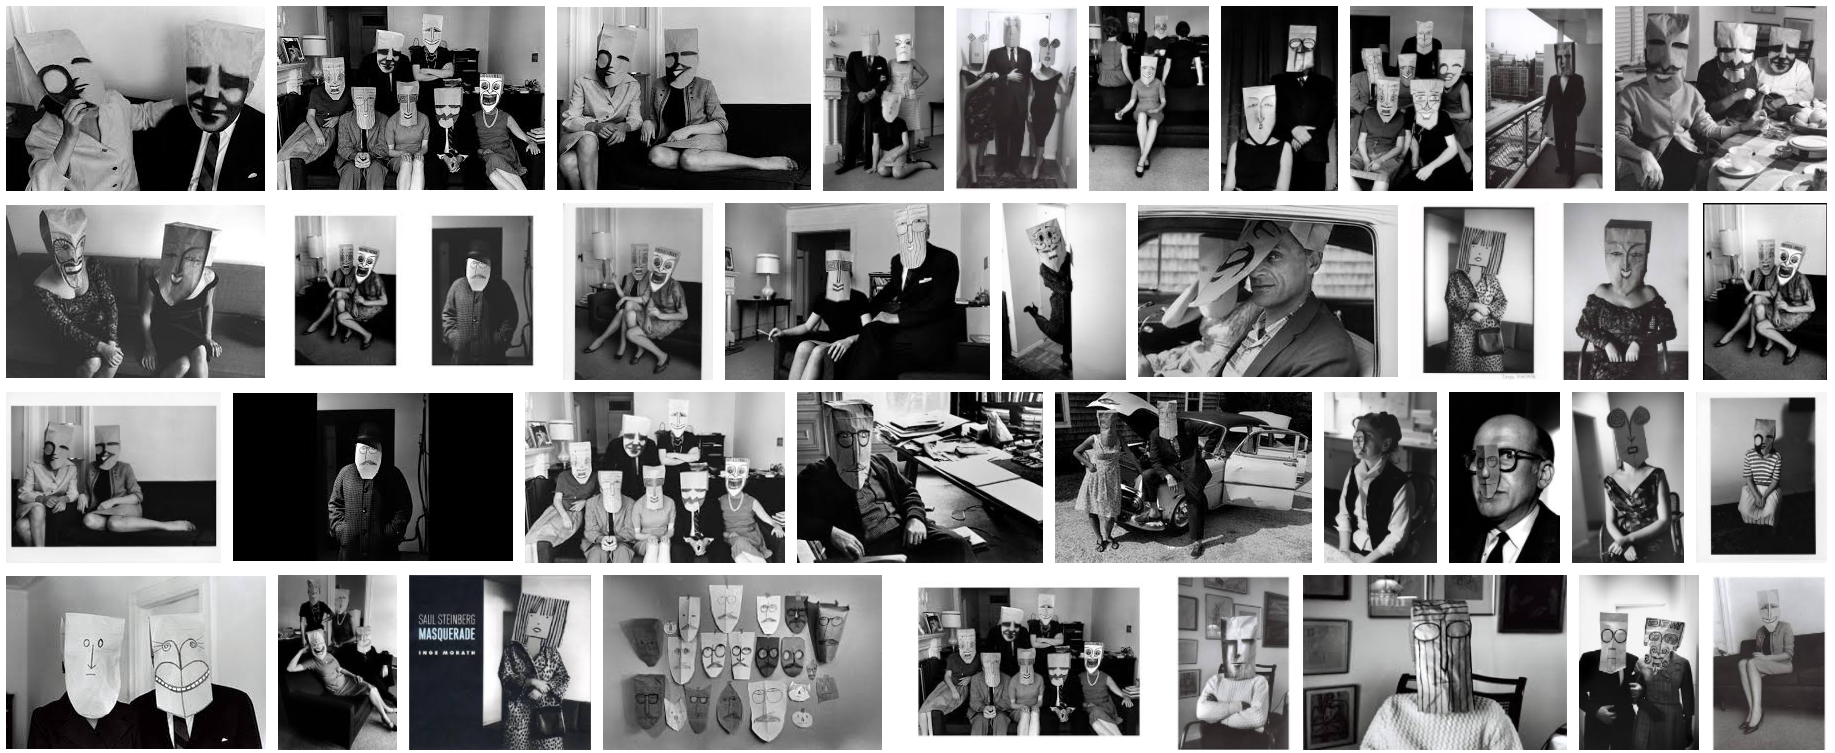
Saul Steinberg was a Romanian and American cartoonist and illustrator, best known for his work for The New Yorker, most notably View of the World from 9th Avenue. He described himself as "a writer who draws". Ingeborg Hermine "Inge" Morath was an Austrian-born American photographer. In 1953, she joined the Magnum Photos Agency, founded by top photographers in Paris, and became a full photographer with the agency in 1955. They have worked together on this specific topic within photography, best known as hiding and disguising a person's face for dramatic effect. I really like this this style of photography as it is very basic but effective, most of there images are in black and white with groups of people having the masks over their face. Her images are very interesting and at a first glance doesn't look very professional or interesting, but when you look again and reconsider what he has done to the image you look at it from a different light and have more of an interest to his work.
Deconstruction Of
Saul Steinberg & Inge Morath's Work


My Work
Using His Technique
|

|
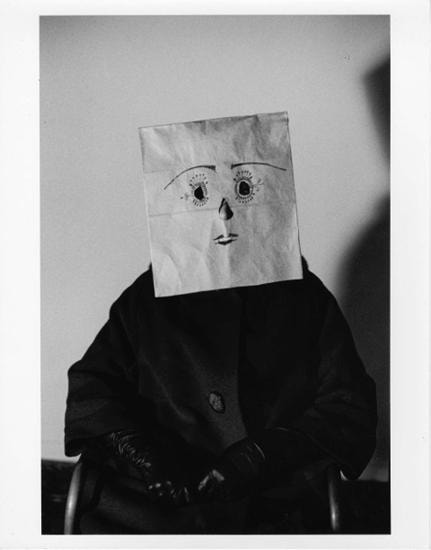
Ideas From Research, After researching costume and mask and my chosen artist i have decided to explore colorful masks, animal masks, and bah head masks as my three chosen responses, I think these ideas will work well and synergise together and also allow for me to experiment with colours and different lighting techniques.
What Am I Going To Do, I am going to start with the bag head masks first, i am planning on making 3 styled masks to use, i will be taking portraits as well as different angles of the model, such as to the side and from below, also moving the light temperature strong and weak.
How I Will Do This, I will use the three made masks and take my model into a dimly lit room and experiment using different angles and lighting techniques, I will take portrait format images and add filters such as black and white to make the image more interesting.
Experiments, Ideas & Observations
Response 1- Bag Head Images
What I Did
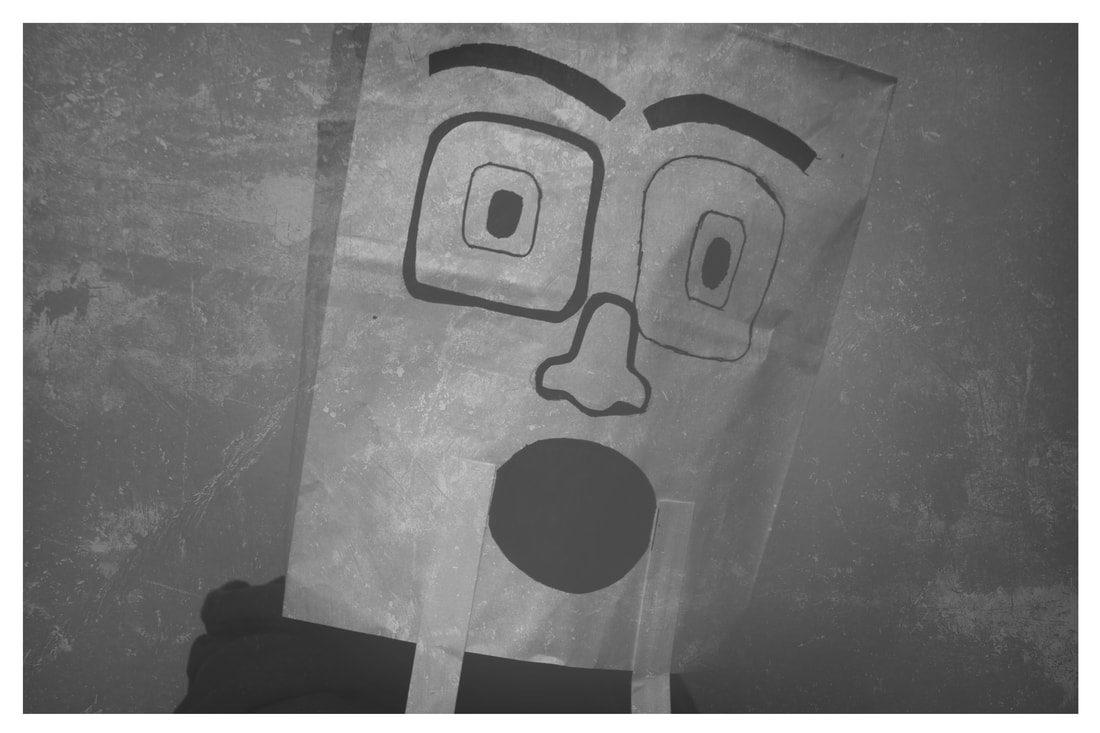
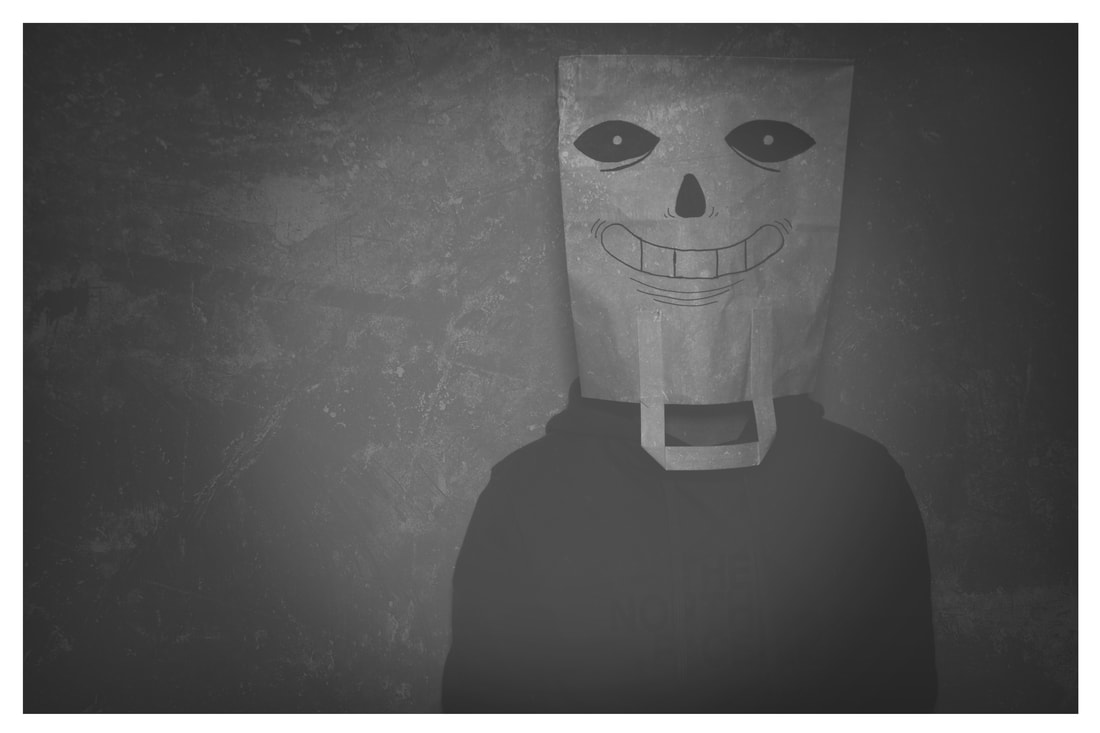
For my first response I wanted to have 3 similar styled masks and take portrait images experimenting with different light positions and try different angles to make the image interesting, I had my brother put the masks on and stand in different positions against a plain white canvas wall and I then took images using my DSLR camera on different settings, i started taking the images in portrait mode and then moved over to auto and night mode, i think using these modes worked well and show creativity. After the photoshoot was over I then exported them onto my computer where I begin simple editing techniques on adobe photoshop, i didn't want to experiment to much on the images so i just tuned up the lights and made more of a shadow in lighter areas, as wella as changing the contrast.
Raw Photos


Experimenting in Photoshop 1
Taking these images into photoshop it was only slight touches just to increase the images shade and style, For example i would increase the levels and hue saturation to make the background of the image darker and using curves to brighten the model, This worked well and gave the images there own style.


What was good?
After editing these images above very briefly i really like how they have turned out, I think they are very interesting to look at and enjoy how they look as a set. I think they work well together as a set and also show the level of detail that went into making every photo, from the light and composition the images have been carefully constructed to show meaning. I am now going to experiment with different colours and editing the images together below.
What could have been better?
I think putting the models in different locations would have made the images better, i think this was the only area of this topic i didn't explore as i took all the images in one setting and location with no background other than a wal, this idea is strong as it was used in my artist research putting the masked person in a everyday use location with normal people in the background.
Experimenting in Photoshop 2
What I did
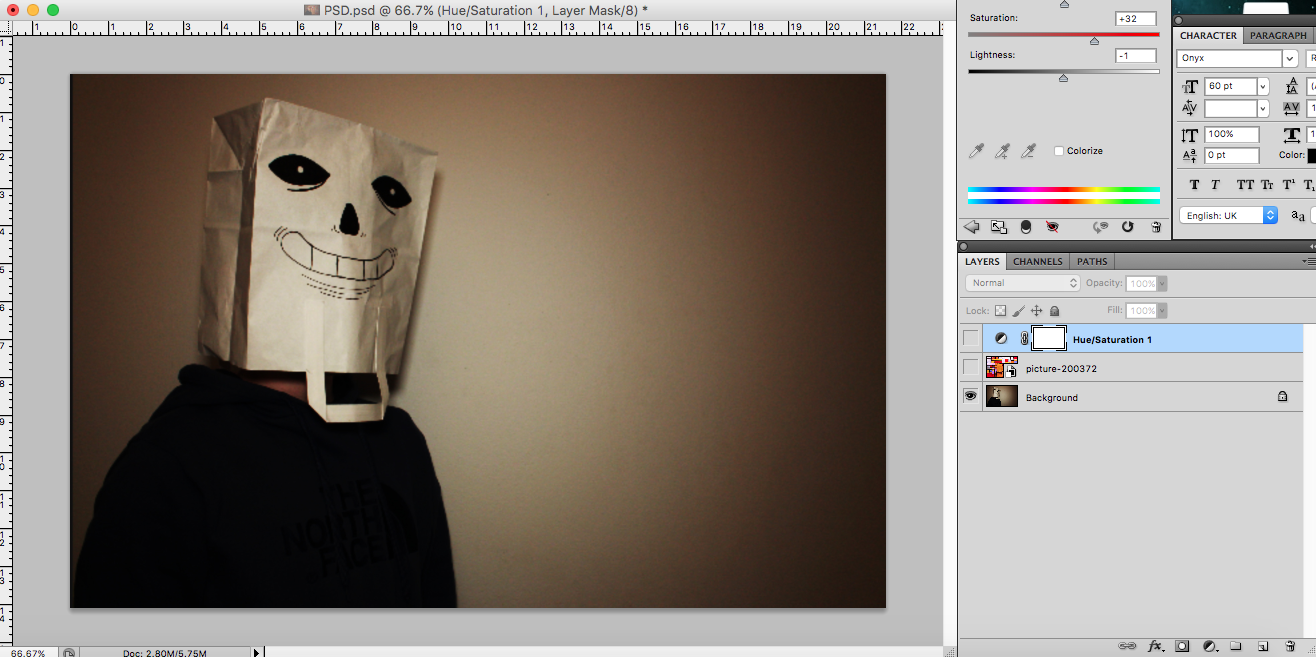
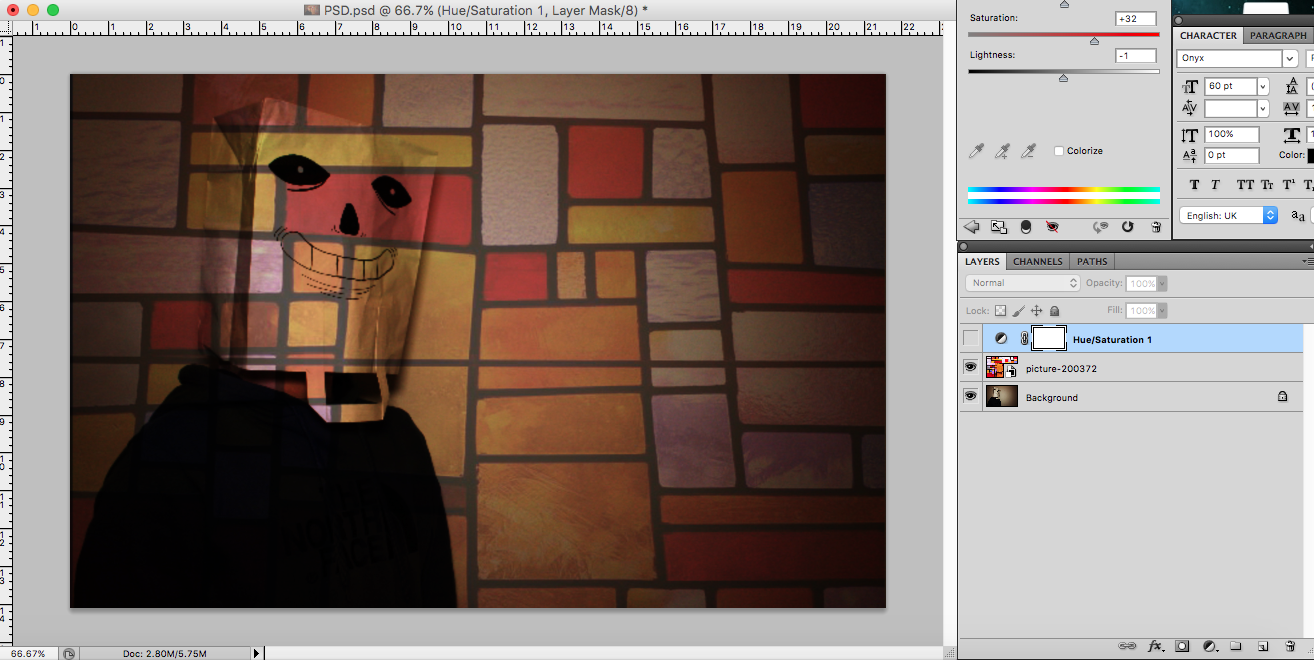
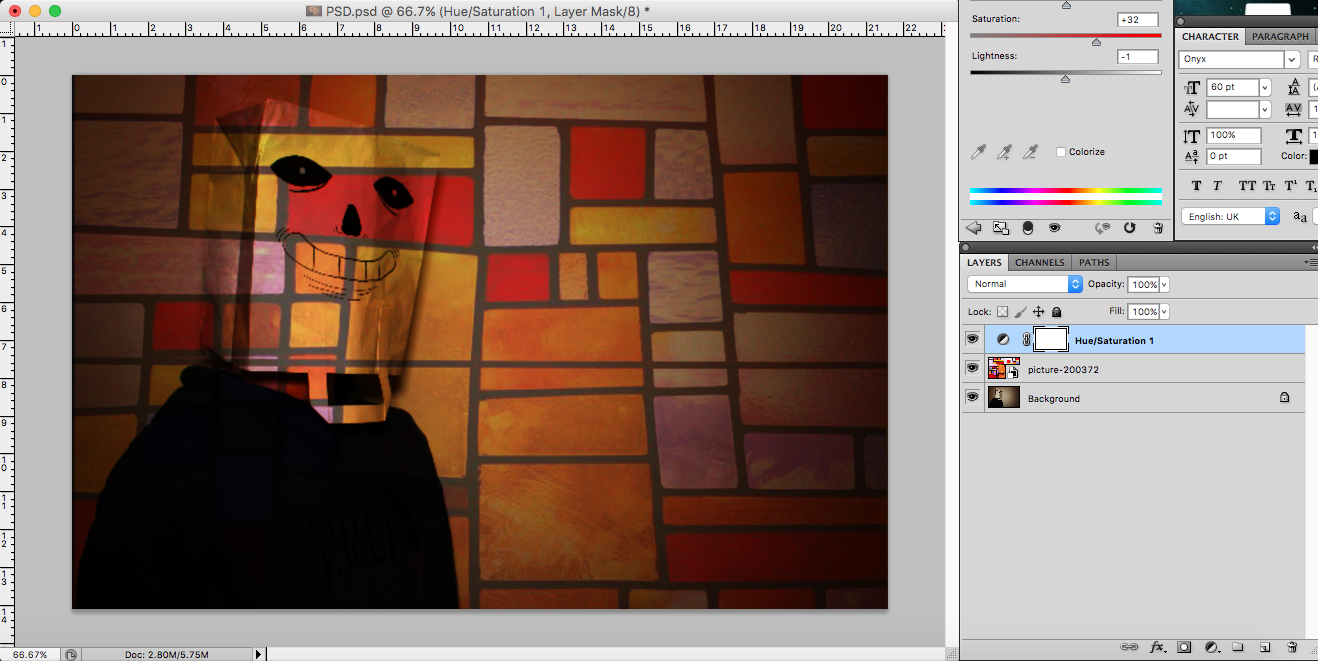
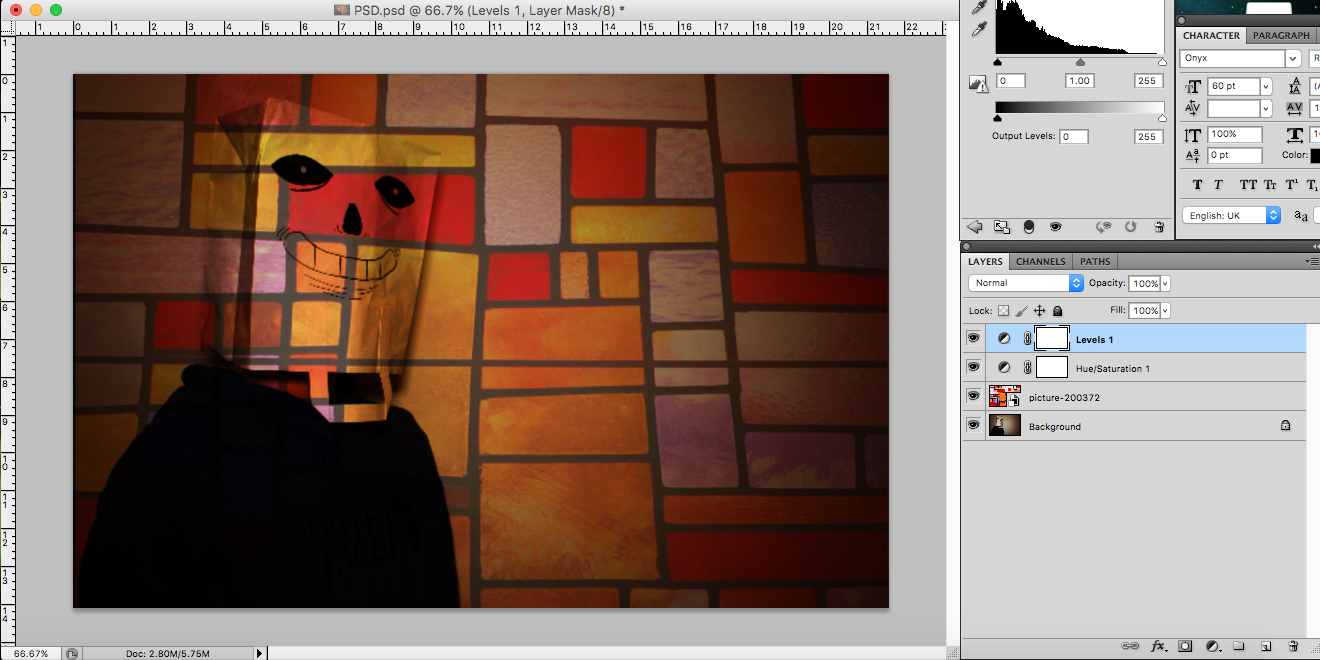
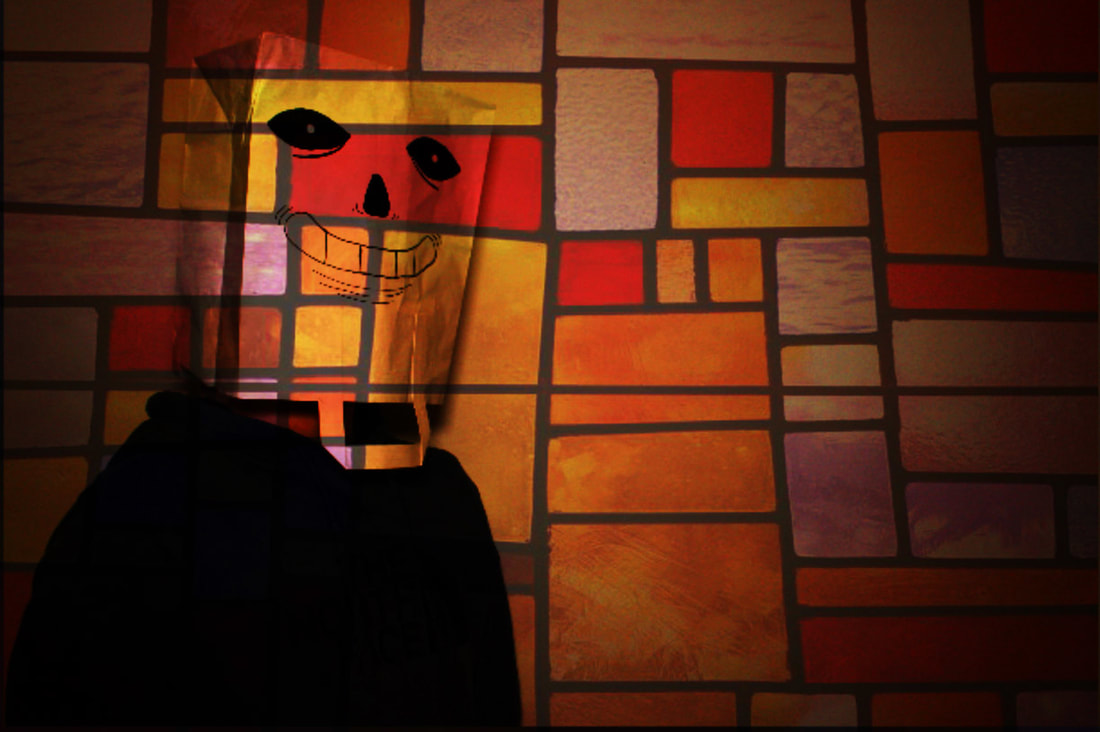
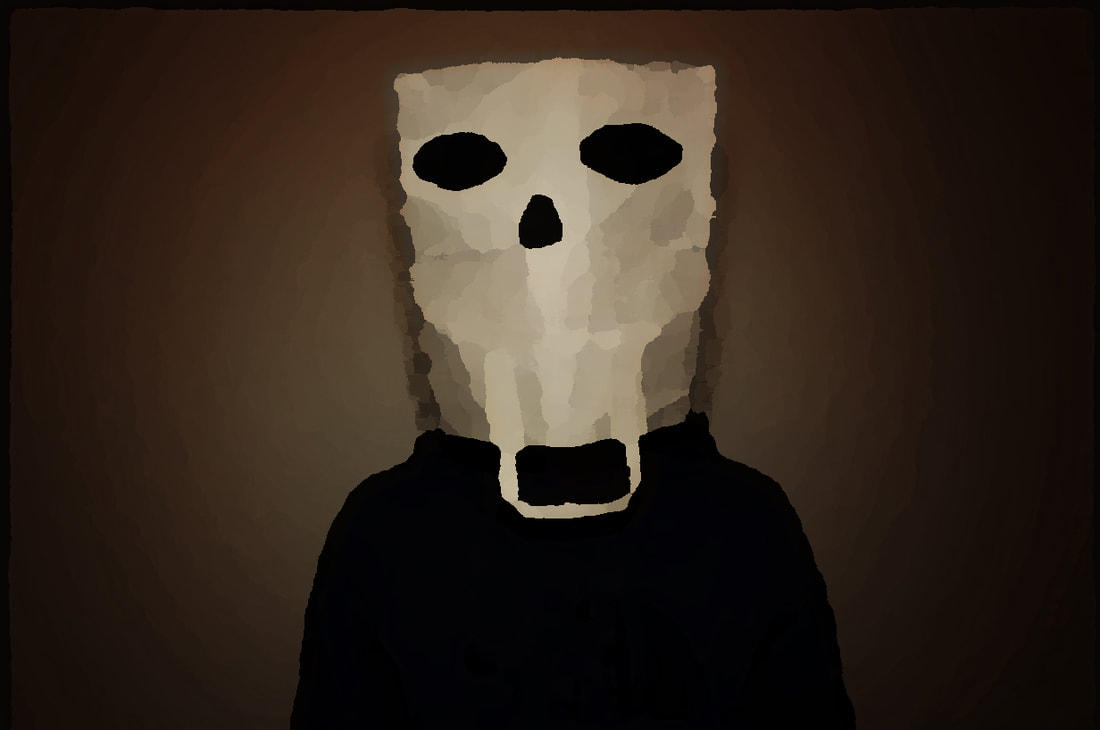
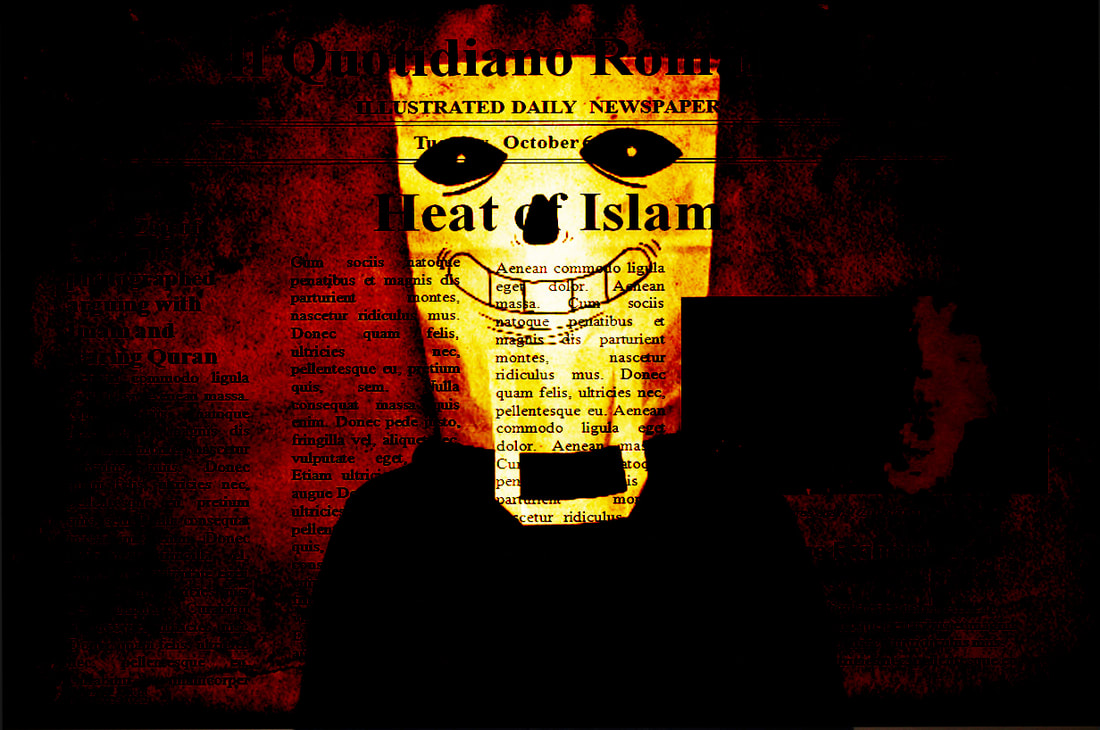
I took a strong image from above and put it into photoshop and edited using a blending tool to put a nice colourful stylish image over the bah head image, and lowered the opacity to make the image less visible but still seeing the effect. For my next edited image i used a filter tool to make the image very blurry when focused, this made the image surreal and creepy with a darker background. My final edited photoshop image is a blending tool again using a old style burnt newspaper and editing to make the image less seeable any areas that would be to clear i would have to curves to make more blurry, this worked really well and gave the image its own style as well as signature look.
|
|
|
|
The Results
More Experimentation
What was good?
After the photoshop development i think these images turned out really good and i'm happy that the images are all different in there own way but still have the focus on the hidden identity behind the mask. The images bring there own style and look great as full frame images.
What could have been better?
I would have like to experiment with blending multiple images of the masked person into one overall image showing different perspectives but i don't think the overall image would have worked and i would like to use the images above as my full frame 3.
Experiment in Photoshop 3
What I did
Taking these images into photoshop i show my six stages of the detailed outcome of this image, firstly i placed a grainy chalk board over the image of the bag head, i then messed with the settings and used a blurry invert of shapes and then finally tunes up with contrast. I would increase the levels and hue saturation to make the background of the image darker and using curves to brighten the model, This worked well and gave the image a style.


Final Result
What was good?
After editing these images above very briefly i really like how they have turned out, I think they are very interesting to look at and enjoy how they look as a set. I think they work well together as a set and also show the level of detail that went into making every photo, from the light and composition the images have been carefully constructed to show meaning. I am now going to experiment with different colours and editing the images together below.
What could have been better?
I think putting the models in different locations would have made the images better, i think this was the only area of this topic i didn't explore as i took all the images in one setting and location with no background other than a wal, this idea is strong as it was used in my artist research putting the masked person in a everyday use location with normal people in the background.
Response 2-Ski Masks
What I Did
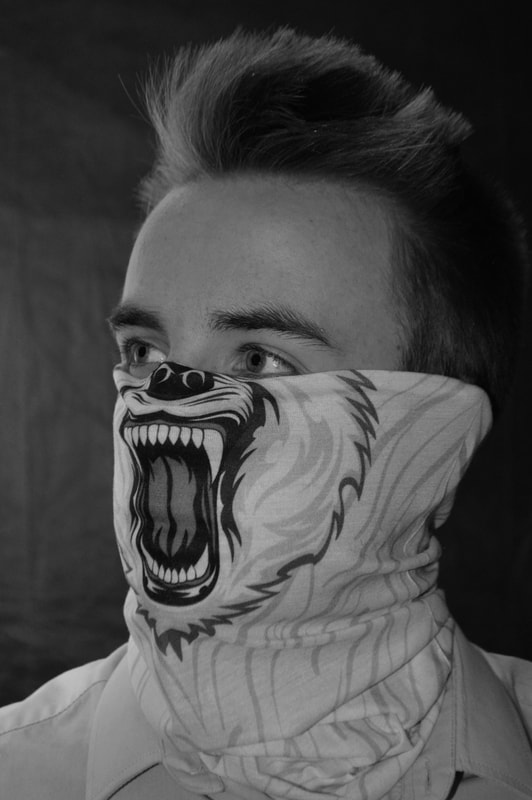
Exploring Costume and mask photography I decided to use 3 unique style masks and put 3 different models into a 3 point lighting set up and take high and low perspective showing the different angles of the mask adn how the light bounces of there face.
Raw Images


Edited Images Using
The Influence Of Colour & Light


|

|
|


What I did
Editing these images i decided to have really dark and low lighting and contrasting images to make them more dramatic and feel scary. These images have turned out really well and show the mood they are portraying through the mask very well. I placed my images into photoshop and edited them to look really moody and dark, I think this has worked we'll and shows photoshop experimentation
What Could Have Been Better
Looking at the pictures i think i could have took the images with more thought, for example instead of a plain black canvas background I could have took my models around public areas and shown more about the innocent of human people around the masked people. I also think the editing of the images maybe could have been more subtle and shown more lighting progression.
Experimentation
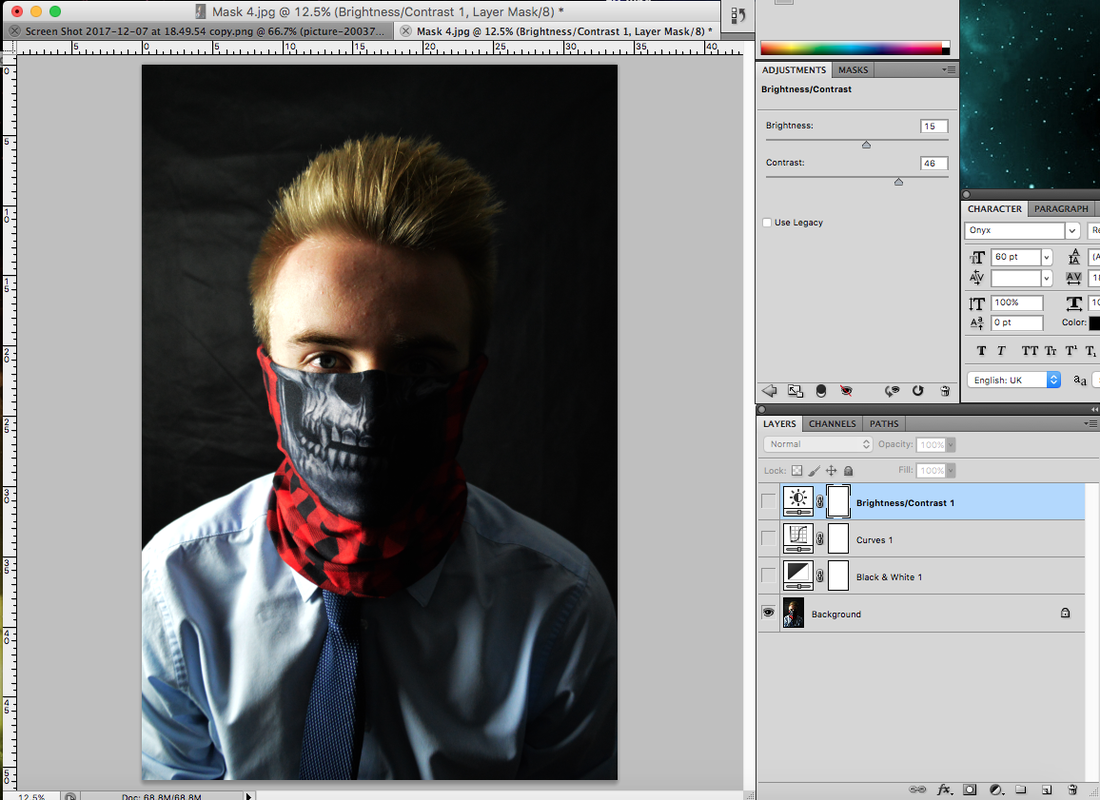
I started by placing my image into photoshop and cropping it into size for editing.
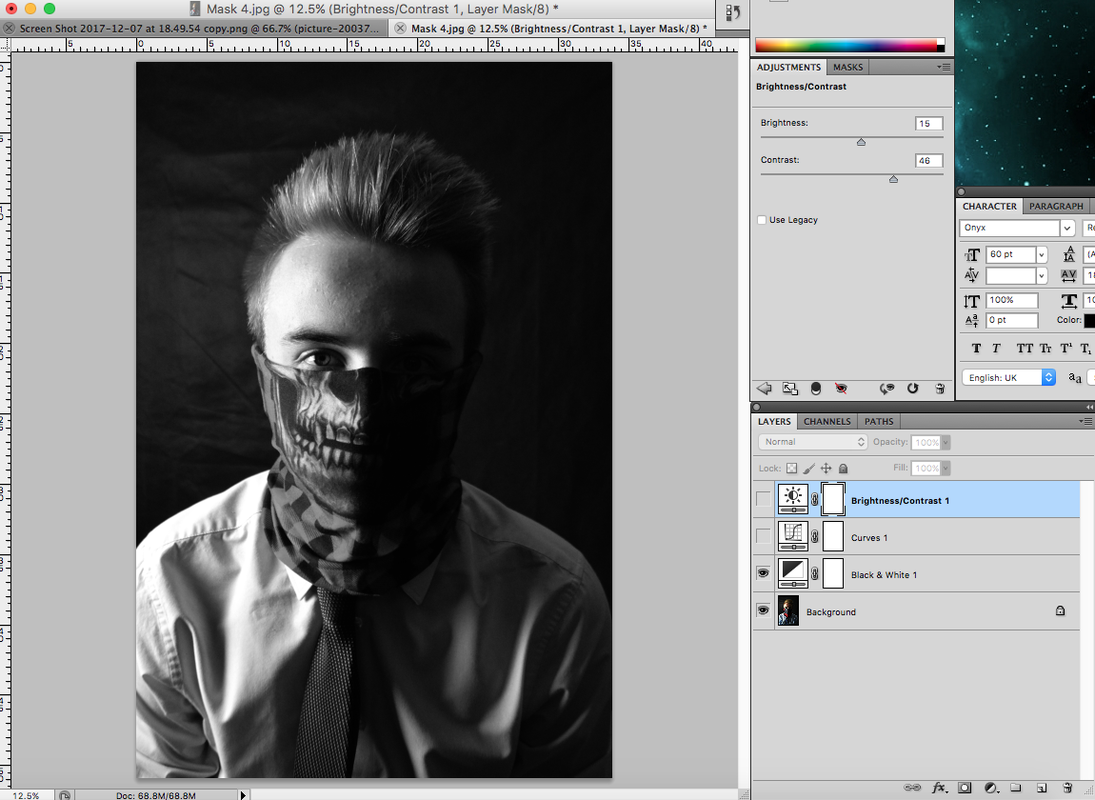
I then wanted the image to feel really moody so I made it Black and White to show the contrast between the colours and also make the image feel less subtle.
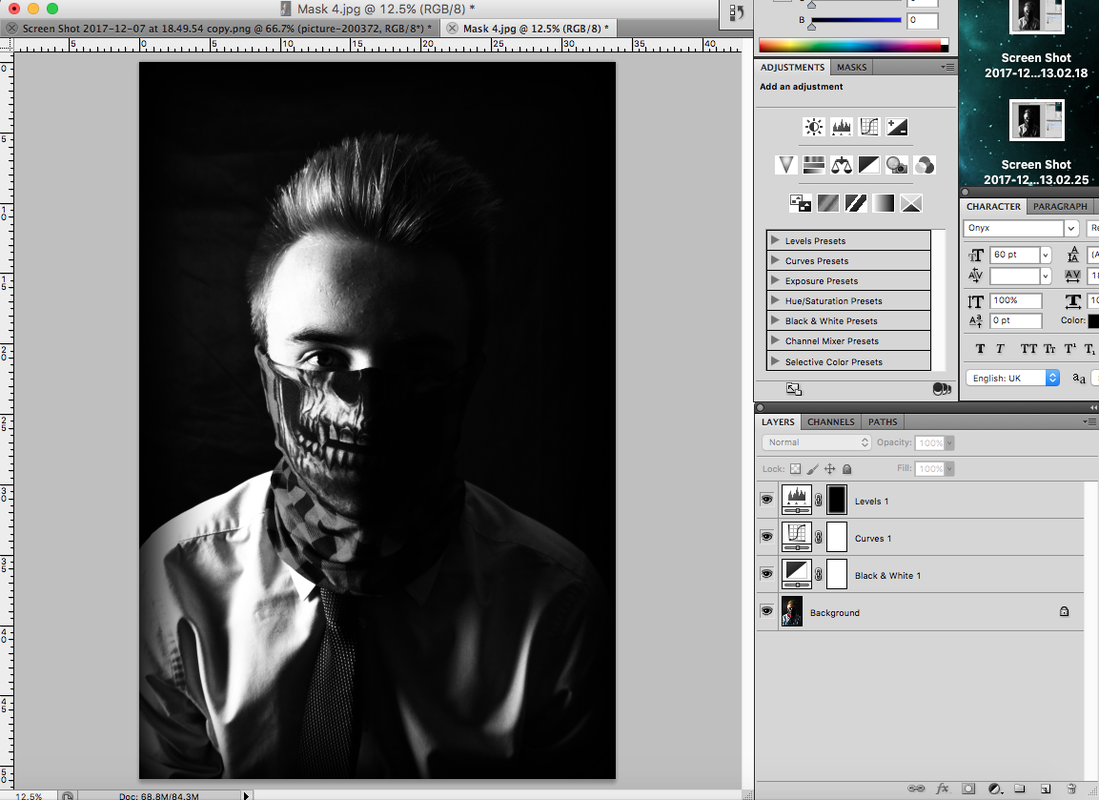
Finally, I decided the image had to have a low key lighting and high contest to make the image look more dramatic, the left hand side of the image has been left in bright on going white while the right has been contrasted all the way down to black to make it feel blended.
The Result
What I Did
I decided to show my experimentation in more detail by playing 3 screenshot step of the way images to show the process of editing the image, how i did iit, how it looked and the overall effect of envy detail going into the steps for the final edit of the picture.
More Experimentation Boosting
Colour And Light


Using my photoshop skills I decided to edit some of my images and use high key colours to make the image look more dramatic and show experimentation, I used a hue saturation effect an used the contested colours which i think worked really well and makes the image look professional.
My Final Response
Raw Images
What I Did
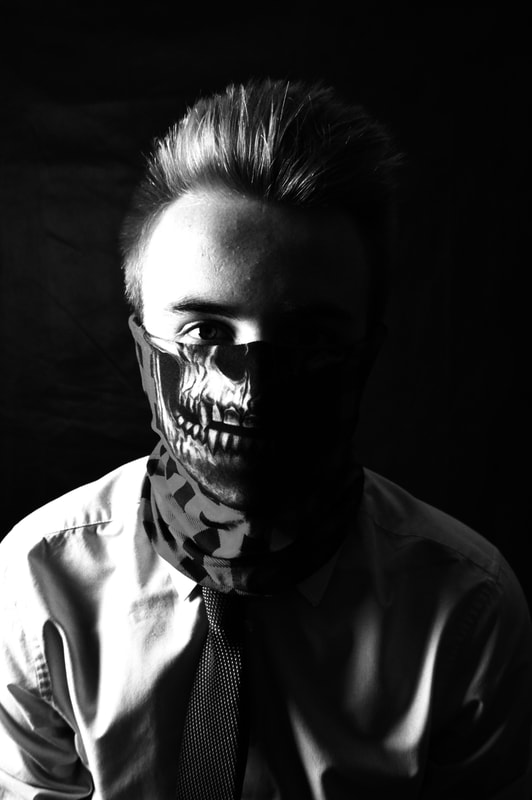
To finish my project I decided to take a brand new model for this work and use making duct tape to cover parts of hid face and make him look in danger or scared to say something, i think these images have turned out well and I'm excited to edit them showing different types of light.


Edited Images

|

|
What Was Good
I really like the mystery to these images, I think they are very unique and show colour and light to its full. The topic has outlined to me how important light is within an image and has to bemused properly to make the image look good.
What Could Have Been Better
I think putting the models in different locations would have made the images better, i think this was the only area of this topic i didn't explore as i took all the images in one setting and location with no background other than a wal, this idea is strong as it was used in my artist research putting the masked person in a everyday use location with normal people in the background.
Conclusion
Finally, I have decided to write a concussion showing what i have learnt and my final thoughts on this topic. I am really happy with my progress and feel I have gained a greater understanding of photography as a whole. I think the exploration of colour and light was perfect for me and allowed me to sow my photographic skills by shown in my personal study. I think looking back at my work from start to finish i have kept a consistent standard of work and made sure to keep it all the way throughout only improving my work. As a final look at my work I think the mask photography is greta for both colour and light. Finalising my work I believe the light portraits were my best work and allowed me a challenge of taking high standard portrait images and also showing how different colours blend to make the image look more detailed.
Bibliography
Phaidon. The Photo Book. 1997. Pgs 436, 438, 442, 448.
Robert Patterson. Website. Black & White Photography.
https://learn.corel.com/tutorials/black-and-white-photography
Chris Smith. Website. 5 Advanced Tips For Light Trails.
https://digital-photography-school.com/5-advanced-tips-light-trail-photography
Jennie Harless. Website. Using Silhouettes
https://improvephotography.com/33518/14-tips-shooting-stunning-silhouettes
Kara Walker. Wikipedia. Photography Background.
https://en.wikipedia.org/wiki/Kara_Walker
Andy Gotts. Wikipedia. Photography Background.
https://en.wikipedia.org/wiki/Andy_Gotts
Wayne Turner. Website. Understanding Colour Photography.
https://www.picturecorrect.com/tips/understanding-color-in-photography
